
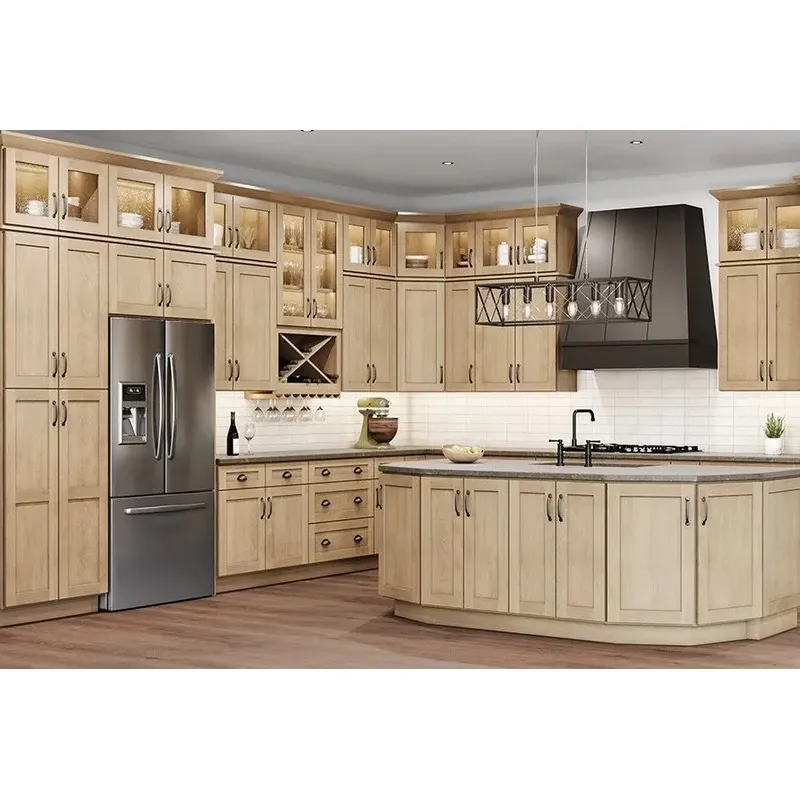
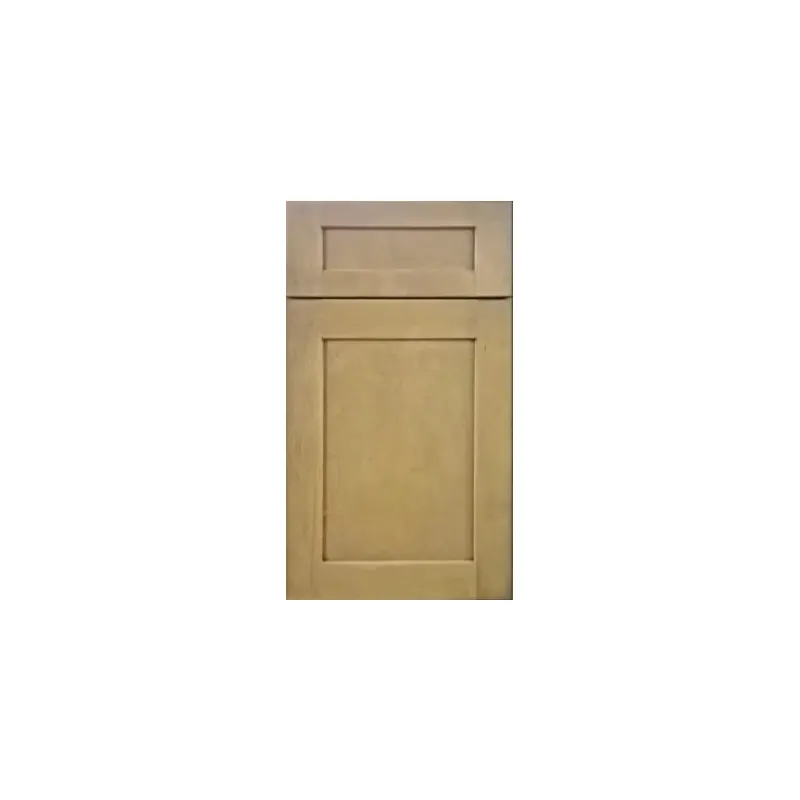
Natural Shaker – Un-Assembled Cabinets
Price range: $18.63 through $1,538.19
Natural Shaker by Highland Cabinetry is a variable unassembled cabinet family with the SKU HCI-NS-ALL. The collection is categorized under Highland Cabinetry Inc and Unassembled Cabinets and is supplied in a ready-to-assemble, flat-pack format. Successful results begin with accurate measurements, complete package reconciliation, a protected work area, exact-item instructions, and an installation plan established before assembly starts.
Highland Natural Shaker RTA Cabinets should be managed separately from similarly named assembled products. Use the HCI-NS-ALL family, exact variation, SKU, and room location throughout the purchase record, receiving register, instruction file, and cabinet schedule. Do not transfer dimensions, fulfillment details, or instructions from the assembled counterpart or another cabinet family.

Review Natural Shaker Grain and Tone in Real Light
A Natural Shaker sample represents the collection’s overall direction, but natural stained fronts can display differences in grain, figure, and tone. One sample cannot predict the location of every light or dark area across a complete room. Use it to coordinate undertones and surrounding finishes rather than expecting every door and drawer front to look identical.
- Daylight: View the sample near each major window during morning, afternoon, and evening conditions.
- Warm fixtures: Check whether the finish becomes more golden beside cream, beige, or warm-toned materials.
- Cooler lighting: Look for contrast that could make the stained finish appear warmer than intended.
- Task lighting: Evaluate the sample beneath fixtures planned for counters, sinks, and appliance work areas.
- Grain movement: Review how vertical and horizontal grain may interact with flooring, counters, and Shaker geometry.
The U.S. Department of Energy’s LED lighting overview provides helpful background when comparing lighting options. Use general lighting information as a starting point, then test the actual cabinet, countertop, backsplash, grout, flooring, paint, appliance finish, and decorative metal beneath the fixtures planned for the room.
Create one portable sample board and move it through the project space. A wood-look floor that appears compatible in a separate photograph may become an unsuccessful near-match beside the cabinet finish. Clear contrast can be easier to coordinate than two tones that almost match but differ in warmth, grain scale, or color direction.
Plan Natural Shaker Cabinet Runs Before Assembly
Begin with a field-measured floor plan and wall elevations. Record wall lengths, ceiling height, windows, doors, trim, soffits, plumbing, electrical points, vents, and other fixed conditions. Check dimensions in several locations when walls, floors, or ceilings appear uneven. Give every cabinet position a room, wall, and sequence code.
- Measure every wall: Verify current site conditions rather than relying entirely on an older drawing.
- Mark fixed services: Record plumbing, electrical, ventilation, switches, outlets, and appliance connections.
- Confirm appliance documents: Use current manufacturer dimensions and required clearances for every selected model.
- Check corner operation: Review cabinet fronts, appliances, pulls, walls, and perpendicular runs.
- Study opposing runs: Consider circulation while cabinet and appliance doors are open.
- Identify transitions: Mark exposed ends, wall clearances, depth changes, and finishing-component locations.
- Create an exact-item schedule: Record each variation, SKU, size, configuration, quantity, and intended position.
Appliance planning should include full dimensions, handles, hinges, ventilation needs, service clearances, and connection points. A refrigerator, oven, dishwasher, or other appliance can extend beyond its marketed width when open. Confirm that operation will not conflict with cabinets, walls, islands, or circulation routes.
Dry-plan the complete cabinet run before opening multiple packages or beginning broad assembly. Match each planned position to an exact order line and package label. If temporary location labels are used, attach them only in a way permitted by current product guidance; do not place unapproved adhesive directly on visible finished surfaces.
Inventory Highland Natural Shaker RTA Cabinets by Label
Reconcile unopened packages before distributing them across the project. Compare carton labels and expected package counts, when known, with the purchase documents. Create a receiving register containing the product name, variation, SKU, room code, wall code, planned position, visible-condition status, and verification status.
- Package received: The carton is present and its label is readable.
- Identity verified: The item matches an exact line on the purchase record.
- Location assigned: The package is connected to a cabinet position on the approved plan.
- Instructions matched: Current documentation has been associated with the exact SKU.
- Contents inventoried: Parts and supplied fasteners have been compared with the applicable instructions.
- Status recorded: The item is unopened, opened, in progress, complete, released, or on hold.
Keep identifying labels and packaging until the order has been reconciled. If a package appears missing, damaged, or inconsistent with the purchase record, follow the seller’s current reporting procedure before mixing its contents with another item.
Open one cabinet package at a time whenever the instructions and work area allow. Parts that look similar may belong to different cabinet sizes or configurations. Keeping each SKU isolated protects the receiving record and makes it easier to identify a missing or unexpected component.
Prepare a Clean Natural Shaker Work Area
For Natural Shaker, use a clean, dry, level, well-lit work area with enough space for the current cabinet and its components. Remove hard debris before placing protective padding or visible fronts on the work surface. Keep food, drinks, standing water, construction dust, and unrelated trade activity away from the active area.
- Read the complete exact-item instruction sequence before beginning.
- Confirm that the parts and supplied fasteners belong to the current SKU.
- Protect stained fronts and visible components as the instructions direct.
- Use clean hands, clean cloths, and uncontaminated padding during handling.
- Keep small parts in labeled containers instead of loose on the floor.
- Separate complete cabinets from packages that are still being inventoried.
Tool selection and personal protective equipment should follow the exact cabinet instructions, tool manuals, and applicable site requirements. Do not improvise fasteners, adhesives, drilling locations, or assembly steps. Stop if components do not align as documented, a part appears missing, or an instruction is unclear.
The Highland Cabinetry assembly videos may provide useful visual context. Treat a general video as a supplement: current written instructions and verified information for the exact SKU should control whenever the resources differ.
Use Natural Shaker Assembly Checkpoints by SKU
A checkpoint is a deliberate pause between project stages. It prevents an unidentified part, incorrect configuration, or unresolved measurement from moving into installation. Define checkpoints before work begins and record the status in the cabinet schedule.
- Identity checkpoint: Confirm the product name, variation, SKU, and planned location.
- Contents checkpoint: Compare parts and supplied fasteners with the exact instructions.
- Work-area checkpoint: Confirm that the surface, lighting, protection, and tools are appropriate.
- Sequence checkpoint: Follow the documented order rather than relying on memory from another cabinet.
- Square checkpoint: Perform the instructed alignment checks before advancing to the next secured stage.
- Completion checkpoint: Compare the completed unit with its documentation and intended plan location.
- Handoff checkpoint: Record when the unit moves from assembly to installation staging.
Do not promise a universal assembly duration. Cabinet configuration, project conditions, instruction review, worker experience, inspection, and corrections can affect the sequence. Build the broader trade schedule around verified project stages instead of an unsupported per-cabinet time.
Check Cabinet Square Without Forcing Components
Where the exact instructions call for a squareness check, comparing diagonal measurements can help show whether a rectangular cabinet is aligned. Follow the documented sequence and any permitted tolerance rather than assuming that perfectly equal numbers are required at every intermediate step.
If diagonal measurements differ or components do not sit as shown, pause. Recheck the level work surface, part identity, orientation, fastening sequence, and instructions. Do not force parts, add unapproved fasteners, or alter drilling locations to make the cabinet appear square. Request clarification when the documented process does not resolve the issue.
Repeat the required checks before a completed unit is released to installation staging. A cabinet should remain connected to its location code, instruction set, and status record throughout the project.
Verified Product-Line Details
Current product information identifies the following construction and operating details for applicable cabinet SKUs in this RTA family:
- Five-piece Shaker stained birch doors and drawer fronts for the stained finish.
- Doors and drawer fronts listed at 3/4-inch with a full-overlay presentation.
- Full-extension, undermount, soft-close concealed steel drawer glides where drawers apply.
- Six-way adjustable 1-1/4-inch hinges with soft-closing inserts where hinged doors apply.
- A 1/2-inch cabinet-grade plywood cabinet box.
- Metal L-bracket reinforcement identified for base-cabinet applications.
- Adjustable cabinet-grade plywood shelves listed at 3/4-inch with metal shelf rests where shelves apply.
- A natural cabinet interior described as clear-coated.
These details do not apply identically to every panel, filler, trim component, accessory, or other nonstandard item. Drawer information applies where the selected SKU includes drawers, hinge information applies where hinged doors are present, and base reinforcement is specifically identified for base-cabinet applications. Verify the exact item before purchase and assembly.
Measure RTA Package Access and Prepare Receiving
Natural Shaker arrives in an unassembled, flat-pack format, but package dimensions can still vary by exact item. Measure gates, exterior doors, hallways, elevators, stairs, landings, and tight turns using current package information when available. Do not assume every carton will fit simply because its contents are not assembled.
- Doorways: Measure usable openings after accounting for stops, handles, doors, and fixed obstructions.
- Elevators: Confirm interior size, door height, reservations, weight rules, and building procedures.
- Stairs: Check landing depth, overhead clearance, railing locations, and changes in direction.
- Interior routes: Remove movable obstacles and protect completed floors before receiving.
- Staging: Reserve a clean, dry area where packages can remain oriented as current handling instructions direct.
Inspect labels and visible packaging promptly. Photograph labels or package condition for the project record when appropriate. Retain identifying materials until the purchase is reconciled, and keep packages with unresolved issues physically separate from released work.
Availability and lead information can vary by exact selection and order. Confirm current item availability, fulfillment details, destination requirements, and the latest estimate before coordinating assemblers, installers, appliances, countertops, or other trades. Do not represent family-level timing as a guaranteed date.
Verify Every Variation and Exact SKU
The HCI-NS-ALL variable family should be purchased and assembled from active selection-level information. A family image, related cabinet, or general video can provide context, but it should not replace the dimensions, configuration, contents, compatibility, and current instructions attached to the exact variation.
- Identity: Confirm the complete product name, selected variation, SKU, quantity, and location code.
- Dimensions: Compare current measurements with the plan, elevations, appliances, and package route.
- Configuration: Verify cabinet type and any orientation or layout details displayed for the selection.
- Included items: Review what accompanies the product and what may require a separate purchase.
- Features: Confirm which shelves, drawers, glides, hinges, or reinforcements apply to that cabinet.
- Instructions: Match current documents and any supporting video with the exact SKU.
- Finish: Confirm that current imagery or an available sample represents the selected variation.
- Fulfillment: Recheck current availability and timing immediately before submitting the order.
Resolve missing or conflicting information before purchase or assembly. Save measured drawings, appliance documents, written clarifications, finish references, product instructions, and the exact-item schedule together so everyone involved works from one current record.
Protect and Care for the Natural Stained Finish
Protect visible parts during receiving, staging, assembly, and installation. Keep stained fronts away from standing water, abrasive debris, dirty padding, and unprotected hard tools. Begin routine care with Highland Cabinetry’s current guidance for the exact finish.
Remove dust with a clean microfiber cloth and address minor marks using a lightly dampened cloth and mild cleaner only when approved. Follow the grain direction where relevant. Test unfamiliar products in an inconspicuous area, avoid harsh solvents, abrasive pads, excessive water, or oily products that may alter the appearance, and dry cleaned areas promptly.
Frequently Asked Questions
Is Natural Shaker supplied as an RTA cabinet line?
Yes. This HCI-NS-ALL family is categorized under Highland Cabinetry Inc and Unassembled Cabinets and is supplied in a ready-to-assemble, flat-pack format. Use current instructions for the exact SKU rather than transferring steps from an assembled product or unrelated family.
Should every stained front have identical grain?
A natural stained collection can display differences in grain, figure, and tone. Use a sample to coordinate the overall palette, but do not treat it as a promise that every component will look identical. Review received parts according to the seller’s current process.
What should be inventoried before assembly?
Confirm the package label, variation, SKU, room location, package count when known, visible condition, exact instructions, component list, and supplied fasteners. Keep each cabinet’s parts separate until the item is complete and has passed its project checkpoints.
How should cabinet square be checked?
Follow the exact instructions. When they call for diagonal measurements, compare the diagonals at the specified stage and use any documented tolerance. If alignment differs, recheck the work surface, parts, orientation, and sequence rather than forcing components.
Do all variations include the same features?
No universal assumption should be made. Drawer glides apply where drawers are present, hinges apply where hinged doors are included, and base reinforcement is specifically identified for base cabinets. Check the active details for every exact SKU.
What should be confirmed before scheduling other trades?
Verify the room measurements, order contents, exact instructions, current availability, package access, assembly status, completed cabinet dimensions, installation sequence, appliance requirements, and unresolved issues. Release downstream work only after the relevant project checkpoint is complete.
Browse current products and available variations in the CabinetryStock shop. Package reconciliation, protected one-SKU assembly, grain-aware finish planning, documented alignment checks, and exact-item verification will help turn Highland Natural Shaker RTA Cabinets into a coordinated project without relying on unsupported assumptions.
Show mapHide map1 location
Product shipping locations
1 location records
Locations assigned to this product. Confirm stock, shipping origin and pickup availability before visiting.
Shared addresses are grouped under one pin. Positions marked approximate show the nearby area. Use the address links for directions.
Brand colors — 1 brands
Show warrantyHide warrantyCoverage & claims
Coverage depends on the collection, component or supplying location. The brand reference below applies only within its stated scope; contact us to confirm the terms for this item.
Limited lifetime · catalog scopeThe 2026 Highland Cabinetry Colorado catalog describes limited lifetime coverage for the original purchaser in an owner-occupied, single-family home. Later claims are subject to product availability and the catalog’s conditions. Labor and transportation are excluded. Confirm the applicable terms with your supplying Highland location.
Manufacturer terms and exclusions apply. Keep your invoice, item numbers and photos. Shipping damage and return requests follow the separate claims process.
Coverage depends on the collection, component or supplying location. The brand reference below applies only within its stated scope; contact us to confirm the terms for this item.
Limited lifetime · catalog scopeThe 2026 Highland Cabinetry Colorado catalog describes limited lifetime coverage for the original purchaser in an owner-occupied, single-family home. Later claims are subject to product availability and the catalog’s conditions. Labor and transportation are excluded. Confirm the applicable terms with your supplying Highland location.
Manufacturer terms and exclusions apply. Keep your invoice, item numbers and photos. Shipping damage and return requests follow the separate claims process.
SINK BASE
| Image | Alt Image | SKU | Description | Qty | Price | |
|---|---|---|---|---|---|---|
 | | HCI-NS-SB42 | SINK BASE Cabinet- 42"W x 34-1/2"H x 24"D - 2D, 2DR, lS | Original price was: $918.98.$524.91Current price is: $524.91. | ||
| | HCI-NS-SB30 | SINK BASE Cabinet- 30"W x 34-1/2"H x 24"D - 2D, 2DR, lS | Original price was: $870.19.$497.05Current price is: $497.05. | ||
| | HCI-NS-SB33 | SINK BASE Cabinet- 33"W x 34-1/2"H x 24"D - 2D, 2DR, lS | Original price was: $870.12.$497.00Current price is: $497.00. | ||
| | HCI-NS-SB36 | SINK BASE Cabinet- 36"W x 34-1/2"H x 24"D - 2D, 2DR, lS | Original price was: $870.12.$497.00Current price is: $497.00. |
STANDARD WALL
| Image | Alt Image | SKU | Description | Qty | Price | |
|---|---|---|---|---|---|---|
| | HCI-NS-W0930 | SINGEL DOOR WALL CABINET 09"W 30"H 12"D | Original price was: $314.69.$179.74Current price is: $179.74. | ||
| | HCI-NS-W1230 | SINGEL DOOR WALL CABINET 12"W 30"H 12"D | Original price was: $369.68.$211.15Current price is: $211.15. | ||
| | HCI-NS-W1530 | SINGEL DOOR WALL CABINET 15"W 30"H 12"D | Original price was: $408.76.$233.48Current price is: $233.48. | ||
| | HCI-NS-W1830 | SINGEL DOOR WALL CABINET 18"W 30"H 12"D | Original price was: $440.66.$251.71Current price is: $251.71. | ||
| | HCI-NS-W2130 | SINGEL DOOR WALL CABINET 21"W 30"H 12"D | Original price was: $472.74.$270.03Current price is: $270.03. | ||
| | HCI-NS-W2430 | 2 DOOR WALL CABINET 24"W 30"H 12"D | Original price was: $549.19.$313.69Current price is: $313.69. | ||
| | HCI-NS-W2730 | 2 DOOR WALL CABINET 27"W 30"H 12"D | Original price was: $611.29.$349.17Current price is: $349.17. | ||
| | HCI-NS-W3030 | 2 DOOR WALL CABINET 30"W 30"H 12"D | Original price was: $663.67.$379.09Current price is: $379.09. | ||
| | HCI-NS-W3330 | 2 DOOR WALL CABINET 33"W 30"H 12"D | Original price was: $708.44.$404.65Current price is: $404.65. | ||
| | HCI-NS-W3630 | 2 DOOR WALL CABINET 36"W 30"H 12"D | Original price was: $747.95.$427.23Current price is: $427.23. | ||
| | HCI-NS-W0936 | SINGEL DOOR WALL CABINET 09"W 36"H 12"D | Original price was: $354.16.$202.29Current price is: $202.29. | ||
| | HCI-NS-W1236 | SINGEL DOOR WALL CABINET 12"W 36"H 12"D | Original price was: $423.01.$241.63Current price is: $241.63. | ||
| | HCI-NS-W1536 | SINGEL DOOR WALL CABINET 15"W 36"H 12"D | Original price was: $458.49.$261.88Current price is: $261.88. | ||
| | HCI-NS-W1836 | SINGEL DOOR WALL CABINET 18"W 36"H 12"D | Original price was: $516.17.$294.83Current price is: $294.83. | ||
| | HCI-NS-W2136 | SINGEL DOOR WALL CABINET 21"W 36"H 12"D | Original price was: $556.26.$317.72Current price is: $317.72. | ||
| | HCI-NS-W2436 | 2 DOOR WALL CABINET 24"W 36"H 12"D | Original price was: $636.33.$363.47Current price is: $363.47. | ||
| | HCI-NS-W2736 | 2 DOOR WALL CABINET 27"W 36"H 12"D | Original price was: $701.87.$400.91Current price is: $400.91. | ||
| | HCI-NS-W3036 | 2 DOOR WALL CABINET 30"W 36"H 12"D | Original price was: $772.75.$441.39Current price is: $441.39. | ||
| | HCI-NS-W3336 | 2 DOOR WALL CABINET 33"W 36"H 12"D | Original price was: $833.14.$475.89Current price is: $475.89. | ||
| | HCI-NS-W3636 | 2 DOOR WALL CABINET 36"W 36"H 12"D | Original price was: $886.07.$506.11Current price is: $506.11. | ||
| | HCI-NS-W0942 | SINGEL DOOR WALL CABINET 09"W 42"H 12"D | Original price was: $452.18.$258.29Current price is: $258.29. | ||
| | HCI-NS-W1242 | SINGEL DOOR WALL CABINET 12"W 42"H 12"D | Original price was: $509.94.$291.28Current price is: $291.28. | ||
| | HCI-NS-W1542 | SINGEL DOOR WALL CABINET 15"W 42"H 12"D | Original price was: $558.58.$319.06Current price is: $319.06. | ||
| | HCI-NS-W1842 | SINGEL DOOR WALL CABINET 18"W 42"H 12"D | Original price was: $610.67.$348.83Current price is: $348.83. | ||
| | HCI-NS-W2142 | SINGEL DOOR WALL CABINET 21"W 42"H 12"D | Original price was: $654.36.$373.75Current price is: $373.75. | ||
| | HCI-NS-W2442 | 2 DOOR WALL CABINET 24"W 42"H 12"D | Original price was: $740.34.$422.88Current price is: $422.88. | ||
| | HCI-NS-W2742 | 2 DOOR WALL CABINET 27"W 42"H 12"D | Original price was: $802.65.$458.48Current price is: $458.48. | ||
| | HCI-NS-W3042 | 2 DOOR WALL CABINET 30"W 42"H 12"D | Original price was: $872.44.$498.34Current price is: $498.34. | ||
| | HCI-NS-W3342 | 2 DOOR WALL CABINET 33"W 42"H 12"D | Original price was: $939.67.$536.75Current price is: $536.75. | ||
| | HCI-NS-W3642 | 2 DOOR WALL CABINET 36"W 42"H 12"D | Original price was: $999.34.$570.82Current price is: $570.82. | ||
| | HCI-NS-W3012 | 2 DOOR WALL CABINET 30"W 12"H 12"D | Original price was: $408.15.$233.13Current price is: $233.13. | ||
| | HCI-NS-W3015 | 2 DOOR WALL CABINET 30"W 15"H 12"D | Original price was: $450.05.$257.06Current price is: $257.06. | ||
| | HCI-NS-W3018 | 2 DOOR WALL CABINET 30"W 18"H 12"D | Original price was: $477.09.$272.51Current price is: $272.51. | ||
| | HCI-NS-W3024 | 2 DOOR WALL CABINET 30"W 24"H 12"D | Original price was: $549.41.$313.82Current price is: $313.82. | ||
| | HCI-NS-W3312 | 2 DOOR WALL CABINET 33"W 12"H 12"D | Original price was: $438.81.$250.65Current price is: $250.65. | ||
| | HCI-NS-W3315 | 2 DOOR WALL CABINET 33"W 15"H 12"D | Original price was: $450.05.$257.06Current price is: $257.06. | ||
| | HCI-NS-W3318 | 2 DOOR WALL CABINET 33"W 18"H 12"D | Original price was: $526.21.$300.57Current price is: $300.57. | ||
| | HCI-NS-W3324 | 2 DOOR WALL CABINET 33"W 24"H 12"D | Original price was: $617.85.$352.92Current price is: $352.92. | ||
| | HCI-NS-W3612 | 2 DOOR WALL CABINET 36"W 12"H 12"D | Original price was: $438.81.$250.65Current price is: $250.65. | ||
| | HCI-NS-W3615 | 2 DOOR WALL CABINET 36"W 15"H 12"D | Original price was: $487.20.$278.28Current price is: $278.28. | ||
| | HCI-NS-W3618 | 2 DOOR WALL CABINET 36"W 18"H 12"D | Original price was: $526.21.$300.57Current price is: $300.57. | ||
| | HCI-NS-W3624 | 2 DOOR WALL CABINET 36"W 24"H 12"D | Original price was: $617.85.$352.92Current price is: $352.92. |
STANDARD PANTRY
| Image | Alt Image | SKU | Description | Qty | Price | |
|---|---|---|---|---|---|---|
| | HCI-NS-PC189024 | SINGLE DOOR PANTRY 18"W 90"H 24"D | Original price was: $2,256.35.$1,288.83Current price is: $1,288.83. | ||
| | HCI-NS-PC188424 | SINGLE DOOR PANTRY 18"W 84"H 24"D | Original price was: $2,169.78.$1,239.37Current price is: $1,239.37. | ||
| | HCI-NS-PC189624 | SINGLE DOOR PANTRY 18"W 96'"H 24"D | Original price was: $2,393.34.$1,367.07Current price is: $1,367.07. | ||
| | HCI-NS-PC248424 | 2 DOOR PANTRY 24"W 84"H 24"D | Original price was: $2,301.77.$1,314.77Current price is: $1,314.77. | ||
| | HCI-NS-PC249024 | 2 DOOR PANTRY 24"W 90"H 24"D | Original price was: $2,411.35.$1,377.36Current price is: $1,377.36. | ||
| | HCI-NS-PC249624 | 2 DOOR PANTRY 24"W 96"H 24"D | Original price was: $2,579.19.$1,473.23Current price is: $1,473.23. | ||
| | HCI-NS-PC308424 | 2 DOOR PANTRY 30"W 84"H 24"D | Original price was: $2,409.80.$1,376.47Current price is: $1,376.47. | ||
| | HCI-NS-PC309024 | 2 DOOR PANTRY 30"W 90"H 24"D | Original price was: $2,552.73.$1,458.12Current price is: $1,458.12. | ||
| | HCI-NS-PC309624 | 2 DOOR PANTRY 30"W 96"H 24"D | Original price was: $2,681.78.$1,531.84Current price is: $1,531.84. |
SINK BASE VANITY
| Image | Alt Image | SKU | Description | Qty | Price | |
|---|---|---|---|---|---|---|
| | HCI-NS-VSB27 | VANITY SINK BASE 27"W 34.5"H 21"D | Original price was: $717.21.$409.67Current price is: $409.67. | ||
| | HCI-NS-VSB2421 | VANITY SINK BASE 24"W 34.5"H 21"D | Original price was: $676.03.$386.15Current price is: $386.15. | ||
| | HCI-NS-VSB3021 | VANITY SINK BASE 30"W 34.5"H 21"D | Original price was: $717.21.$409.67Current price is: $409.67. | ||
| | HCI-NS-VSB33 | VANITY SINK BASE 33"W 34.5"H 21"D | Original price was: $809.65.$462.48Current price is: $462.48. | ||
| | HCI-NS-VSB3621 | VANITY SINK BASE 36"W 34.5"H 21"D | Original price was: $809.51.$462.39Current price is: $462.39. | ||
| | HCI-NS-VSD4821D | VANITY SINK BASE DRAWER 48"W 34.5"H 21"D | Original price was: $1,576.63.$900.57Current price is: $900.57. | ||
| | HCI-NS-VSD6021D | VANITY SINK BASE DRAWER 60"W 34.5"H 21"D | Original price was: $1,959.31.$1,119.15Current price is: $1,119.15. |
DECORATIVE DOOR
| Image | Alt Image | SKU | Description | Qty | Price | |
|---|---|---|---|---|---|---|
| — | HCI-NS-FD1242 | Wall Decorative Door, W 11.5", H 41.5", D 3/4" | Original price was: $273.40.$156.17Current price is: $156.17. | ||
| — | HCI-NS-BFD24 | Wall Decorative Door, W 24.5", H 29.5", D 3/4" | Original price was: $384.69.$219.73Current price is: $219.73. | ||
| — | HCI-NS-FD1230 | Wall Decorative Door, W 11.5", H 29.5", D 3/4" | Original price was: $195.24.$111.52Current price is: $111.52. | ||
| — | HCI-NS-FD1236 | Wall Decorative Door, W 11.5", H 35.5", D 3/4" | Original price was: $234.39.$133.89Current price is: $133.89. |
LIGHT RAIL MOULDING
| Image | Alt Image | SKU | Description | Qty | Price | |
|---|---|---|---|---|---|---|
| — | HCI-NS-LRM8 | Light Rail Molding, W 0.25", H 4.5", D 96" | Original price was: $78.56.$44.86Current price is: $44.86. |
3" FILLER
| Image | Alt Image | SKU | Description | Qty | Price | |
|---|---|---|---|---|---|---|
| — | HCI-NS-WF330 | Fillers, W 3", H 30", D 0.75" | Original price was: $51.95.$29.67Current price is: $29.67. | ||
| — | HCI-NS-TF3*96 | Tall Fillers, W 3", H 96", D 0.75" | Original price was: $190.72.$108.94Current price is: $108.94. | ||
| — | HCI-NS-WF336 | Fillers, W 3", H 36", D 0.75" | Original price was: $59.23.$33.83Current price is: $33.83. |
WOODEN HOOD
| Image | Alt Image | SKU | Description | Qty | Price | |
|---|---|---|---|---|---|---|
| — | HCI-NS-RH36 | Hood Vent 36"W 36"H 24"D 33" OPENING | Original price was: $1,150.58.$657.20Current price is: $657.20. |
VALANCE
| Image | Alt Image | SKU | Description | Qty | Price | |
|---|---|---|---|---|---|---|
| — | HCI-NS-V36 | Arched Valence, W 36", H 6", D 3/4" | Original price was: $97.99.$55.97Current price is: $55.97. | ||
| — | HCI-NS-SCM3 | Cove Crown Molding, W 3 3/4", H 96", D 3/4". | Original price was: $211.09.$120.57Current price is: $120.57. | ||
| — | HCI-NS-SCM2 | Cove Crown Molding, W 2 1/4", H 96", D 3/4". | Original price was: $303.89.$173.58Current price is: $173.58. | ||
| — | HCI-NS-V42 | Arched Valence, W 42", H 6" D 3/4" | Original price was: $115.93.$66.21Current price is: $66.21. | ||
| — | HCI-NS-V48 | Arched Valence, W 48", H 6", D 3/4" | Original price was: $127.06.$72.57Current price is: $72.57. |
DIAGIONAL WALL
| Image | Alt Image | SKU | Description | Qty | Price | |
|---|---|---|---|---|---|---|
| | HCI-NS-WDC243012 | WALL DIAGONAL CABINET 24"H 30"H 12"D | Original price was: $687.20.$392.53Current price is: $392.53. | ||
| | HCI-NS-WDC243612 | WALL DIAGONAL CABINET 24"H 36"H 12"D | Original price was: $826.79.$472.27Current price is: $472.27. | ||
| | HCI-NS-WDC244212 | WALL DIAGONAL CABINET 24"H 42"H 12"D | Original price was: $962.19.$549.59Current price is: $549.59. |
LASY SUSAN WALL
| Image | Alt Image | SKU | Description | Qty | Price | |
|---|---|---|---|---|---|---|
| | HCI-NS-WLS243012 | WALL LAZY SUSAN 24"W 30"H 12"D | Original price was: $687.20.$392.53Current price is: $392.53. | ||
| | HCI-NS-WLS243612 | WALL LAZY SUSAN 24"W 36"H 12"D | Original price was: $826.79.$472.27Current price is: $472.27. | ||
| | HCI-NS-WLS244212 | WALL LAZY SUSAN 24"W 42"H 12"D | Original price was: $962.19.$549.59Current price is: $549.59. |
DEEP WALL
| Image | Alt Image | SKU | Description | Qty | Price | |
|---|---|---|---|---|---|---|
| | HCI-NS-W361224 | 2 DOOR WALL CABINET 36"W 12"H 24"D | Original price was: $626.18.$357.69Current price is: $357.69. | ||
| | HCI-NS-W361524 | 2 DOOR WALL CABINET 36"W 15"H 24"D | Original price was: $691.77.$395.14Current price is: $395.14. | ||
| | HCI-NS-W361824 | 2 DOOR WALL CABINET 36"W 18"H 24"D | Original price was: $769.49.$439.52Current price is: $439.52. | ||
| | HCI-NS-W362424 | 2 DOOR WALL CABINET 36"W 24"H 24"D | Original price was: $911.40.$520.59Current price is: $520.59. |
OPEN END WALL
| Image | Alt Image | SKU | Description | Qty | Price | |
|---|---|---|---|---|---|---|
| — | HCI-NS-WES0930 | WALL END SHELF CABINET 09"W 30"H 12"D | Original price was: $356.48.$203.62Current price is: $203.62. | ||
| — | HCI-NS-WES0936 | WALL END SHELF CABINET 09"W 36"H 12"D | Original price was: $402.35.$229.83Current price is: $229.83. | ||
| — | HCI-NS-WES0942 | WALL END SHELF CABINET 09"W 42"H 12"D | Original price was: $466.32.$266.37Current price is: $266.37. |
ANGLED END WALL
| Image | Alt Image | SKU | Description | Qty | Price | |
|---|---|---|---|---|---|---|
| — | HCI-NS-WEC1230 | WALL END CABINET 12"W 30"H 12"D | Original price was: $665.91.$380.36Current price is: $380.36. | ||
| — | HCI-NS-WEC1236 | WALL END CABINET 12"W 36"H 12"D | Original price was: $732.98.$418.67Current price is: $418.67. | ||
| — | HCI-NS-WEC1242 | WALL END CABINET 12"W 42"H 12"D | Original price was: $766.83.$438.00Current price is: $438.00. |
MICROWAVE WALL
| Image | Alt Image | SKU | Description | Qty | Price | |
|---|---|---|---|---|---|---|
| | HCI-NS-WMC2730 | WALL MICROWAVE CABINET 27"W 30"H 12"D | Original price was: $741.82.$423.73Current price is: $423.73. | ||
| | HCI-NS-WMC2736 | WALL MICROWAVE CABINET 27"W 36"H 12"D | Original price was: $791.02.$451.83Current price is: $451.83. | ||
| | HCI-NS-WMC2742 | WALL MICROWAVE CABINET 27"W 42"H 12"D | Original price was: $839.38.$479.46Current price is: $479.46. |
GLASS CABINET
| Image | Alt Image | SKU | Description | Qty | Price | |
|---|---|---|---|---|---|---|
| | HCI-NS-WG1230 | WALL GLASS CABINET 12"W 30"H 12"D | Original price was: $345.10.$197.11Current price is: $197.11. | ||
| | HCI-NS-WG1530 | WALL GLASS CABINET 15"W 30"H 12"D | Original price was: $435.07.$248.52Current price is: $248.52. | ||
| | HCI-NS-WG1830 | WALL GLASS CABINET 18"W 30"H 12"D | Original price was: $524.61.$299.66Current price is: $299.66. | ||
| | HCI-NS-WG1236 | WALL GLASS CABINET 12"W 36"H 12"D | Original price was: $207.71.$118.65Current price is: $118.65. | ||
| | HCI-NS-WG1536 | WALL GLASS CABINET 15"W 36"H 12"D | Original price was: $261.73.$149.50Current price is: $149.50. | ||
| | HCI-NS-WG1836 | WALL GLASS CABINET 18"W 36"H 12"D | Original price was: $315.56.$180.25Current price is: $180.25. | ||
| | HCI-NS-WG1242 | WALL GLASS CABINET 12"W 42"H 12"D | Original price was: $242.88.$138.74Current price is: $138.74. | ||
| | HCI-NS-WG1542 | WALL GLASS CABINET 15"W 42"H 12"D | Original price was: $306.14.$174.86Current price is: $174.86. | ||
| | HCI-NS-WG1842 | WALL GLASS CABINET 18"W 42"H 12"D | Original price was: $369.03.$210.79Current price is: $210.79. |
DIAGIONAL GLASS WALL
| Image | Alt Image | SKU | Description | Qty | Price | |
|---|---|---|---|---|---|---|
| | HCI-NS-WDCG243012 | WALL DIAGONAL CABINET GLASS 24"H 30"H 12"D | Original price was: $146.09.$83.45Current price is: $83.45. | ||
| | HCI-NS-WDCG243612 | WALL DIAGONAL CABINET GLASS 24"H 36"H 12"D | Original price was: $231.28.$132.11Current price is: $132.11. | ||
| | HCI-NS-WDCG244212 | WALL DIAGONAL CABINET GLASS 24"H 42"H 12"D | Original price was: $270.43.$154.47Current price is: $154.47. |
2 DRAWER BASE
| Image | Alt Image | SKU | Description | Qty | Price | |
|---|---|---|---|---|---|---|
| | HCI-NS-2DB24 | 2 DRAWER BASE CABINET 24"W 34.5H 24D" | Original price was: $1,299.56.$742.31Current price is: $742.31. | ||
| | HCI-NS-2DB30 | 2 DRAWER BASE CABINET 30"W 34.5H 24D" | Original price was: $1,357.61.$775.46Current price is: $775.46. | ||
| | HCI-NS-2DB36 | 2 DRAWER BASE CABINET 36"W 34.5H 24D" | Original price was: $1,481.61.$846.29Current price is: $846.29. |
STANDARD BASE
| Image | Alt Image | SKU | Description | Qty | Price | |
|---|---|---|---|---|---|---|
| | HCI-NS-B09 | 9" Base Cabinet 09"W 34 1/2"H 24"D | Original price was: $600.01.$342.74Current price is: $342.74. | ||
| | HCI-NS-B12 | 12" Base Cabinet 12"W34 1/2"H 24"D | Original price was: $653.85.$373.48Current price is: $373.48. | ||
| | HCI-NS-B15 | 15" Base Cabinet 15"W34 1/2"H 24"D | Original price was: $696.62.$397.91Current price is: $397.91. | ||
| | HCI-NS-B18 | 18" Base Cabinet 18"W34 1/2"H 24"D | Original price was: $747.40.$426.91Current price is: $426.91. | ||
| | HCI-NS-B21 | 21" Base Cabinet 21"W34 1/2"H 24"D | Original price was: $811.71.$463.65Current price is: $463.65. | ||
| | HCI-NS-B24 | Base Cabinet- 24"W x 34-1/2"H x 24"D - 2D, lDR , lS | Original price was: $907.16.$518.17Current price is: $518.17. | ||
| | HCI-NS-B27 | Base Cabinet- 27"W x 34-1/2"H x 24"D - 2D, lDR , lS | Original price was: $973.89.$556.29Current price is: $556.29. | ||
| | HCI-NS-B30 | Base Cabinet- 30"W x 34-1/2"H x 24"D - 2D, 2DR, lS | Original price was: $1,077.28.$615.34Current price is: $615.34. | ||
| | HCI-NS-B33 | Base Cabinet- 33"W x 34-1/2"H x 24"D - 2D, 2DR, lS | Original price was: $1,165.99.$666.00Current price is: $666.00. | ||
| | HCI-NS-B36 | Base Cabinet- 36"W x 34-1/2"H x 24"D - 2D, 2DR, lS | Original price was: $1,216.12.$694.64Current price is: $694.64. | ||
| | HCI-NS-B39 | Base Cabinet- 39"W x 34-1/2"H x 24"D - 2D, 2DR, lS | Original price was: $1,277.81.$729.89Current price is: $729.89. | ||
| | HCI-NS-B42 | Base Cabinet- 42"W x 34-1/2"H x 24"D - 2D, 2DR, lS | Original price was: $1,334.19.$762.09Current price is: $762.09. |
BLIND CORNER BASE
| Image | Alt Image | SKU | Description | Qty | Price | |
|---|---|---|---|---|---|---|
| | HCI-NS-BBC42 | BASE BLIND CORNER 42"W 34.5"H 24"D | Original price was: $1,020.05.$582.64Current price is: $582.64. |
END BASE
| Image | Alt Image | SKU | Description | Qty | Price | |
|---|---|---|---|---|---|---|
| | HCI-NS-BEC24 | BASE END CABINET 24"W 34.5"H 24"D | Original price was: $939.82.$536.82Current price is: $536.82. |
OPEN END BASE
| Image | Alt Image | SKU | Description | Qty | Price | |
|---|---|---|---|---|---|---|
| — | HCI-NS-BES09 | BASE END SHELF CABINET 09"W 34.5H 24D" | Original price was: $380.34.$217.24Current price is: $217.24. |
LASY SUSAN CORNER BASE
| Image | Alt Image | SKU | Description | Qty | Price | |
|---|---|---|---|---|---|---|
| | HCI-NS-BLS33 | LASY SUSAN BASE 33"W 34.5"H 24"D | Original price was: $1,341.90.$766.48Current price is: $766.48. | ||
| | HCI-NS-BLS36 | LASY SUSAN BASE 36"W 34.5"H 24"D | Original price was: $1,376.12.$786.03Current price is: $786.03. |
FARM SINK BASE 2
| Image | Alt Image | SKU | Description | Qty | Price | |
|---|---|---|---|---|---|---|
| | HCI-NS-FSB36 | FARM SINK BASE CABINET NO APPRON 36"W 34.5"H 24"D | Original price was: $948.27.$541.65Current price is: $541.65. |
MICROWAVE BASE
| Image | Alt Image | SKU | Description | Qty | Price | |
|---|---|---|---|---|---|---|
| — | HCI-NS-BMC30 | MICROWAVE BASE CABINET 30"W 34.5"H 24"D | Original price was: $983.32.$561.67Current price is: $561.67. |
TRASH BASE
| Image | Alt Image | SKU | Description | Qty | Price | |
|---|---|---|---|---|---|---|
| | HCI-NS-BWB18 | TRASH CAN BASE 18"W 34.5"H 24"D | Original price was: $989.02.$564.92Current price is: $564.92. |
CORNER SINK BASE
| Image | Alt Image | SKU | Description | Qty | Price | |
|---|---|---|---|---|---|---|
| | HCI-NS-CSB36 | CORNER SINK BASE CABINET 36"W 34.5"H 24"D | Original price was: $1,191.10.$680.35Current price is: $680.35. |
3 DRAWER BASE
| Image | Alt Image | SKU | Description | Qty | Price | |
|---|---|---|---|---|---|---|
| — | HCI-NS-DB12 | 3 DRAWER BASE CABINET 12"W 34.5H 24D" | Original price was: $1,024.06.$584.94Current price is: $584.94. | ||
| — | HCI-NS-DB15 | 3 DRAWER BASE CABINET 15"W 34.5H 24D" | Original price was: $1,104.22.$630.72Current price is: $630.72. | ||
| — | HCI-NS-DB18 | 3 DRAWER BASE CABINET 18"W 34.5H 24D" | Original price was: $1,183.61.$676.06Current price is: $676.06. | ||
| — | HCI-NS-DB21 | 3 DRAWER BASE CABINET 21"W 34.5H 24D" | Original price was: $1,281.08.$731.74Current price is: $731.74. | ||
| — | HCI-NS-DB24 | 3 DRAWER BASE CABINET 24"W 34.5H 24D" | Original price was: $1,367.97.$781.38Current price is: $781.38. | ||
| — | HCI-NS-DB30 | 3 DRAWER BASE CABINET 30"W 34.5H 24D" | Original price was: $1,426.08.$814.57Current price is: $814.57. | ||
| — | HCI-NS-DB36 | 3 DRAWER BASE CABINET 36"W 34.5H 24D" | Original price was: $1,550.02.$885.37Current price is: $885.37. |
SPICE PULL OUT BASE
| Image | Alt Image | SKU | Description | Qty | Price | |
|---|---|---|---|---|---|---|
| | HCI-NS-SP09 | SPICE PULLOUT BASE CABINET 09"W 34.5"H 24"D | Original price was: $763.90.$436.33Current price is: $436.33. |
DRAWER BASE VANITY
| Image | Alt Image | SKU | Description | Qty | Price | |
|---|---|---|---|---|---|---|
| | HCI-NS-VDB12 | VANITY 3 DRAWER BASE 12"W 34.5"H 21"D | Original price was: $895.23.$511.36Current price is: $511.36. | ||
| | HCI-NS-VDB15 | VANITY 3 DRAWER BASE 15"W 34.5"H 21"D | Original price was: $951.10.$543.26Current price is: $543.26. | ||
| | HCI-NS-VDB18 | VANITY 3 DRAWER BASE 18"W 34.5"H 21"D | Original price was: $1,004.97.$574.03Current price is: $574.03. | ||
| | HCI-NS-VDB21 | VANITY 3 DRAWER BASE 21"W 34.5"H 21"D | Original price was: $1,126.07.$643.21Current price is: $643.21. | ||
| | HCI-NS-VDB24 | VANITY 3 DRAWER BASE 24"W 34.5"H 21"D | Original price was: $1,180.66.$674.40Current price is: $674.40. |
SINK VANITY DRAWER TO THE LEFT
| Image | Alt Image | SKU | Description | Qty | Price | |
|---|---|---|---|---|---|---|
| | HCI-NS-VSD4221DL | VANITY SINK BASE DRAWER TO THE LEFT 42"W 34.5"H 21"D | Original price was: $1,374.75.$785.26Current price is: $785.26. |
SINK VANITY DRAWER TO THE RIGHT
| Image | Alt Image | SKU | Description | Qty | Price | |
|---|---|---|---|---|---|---|
| | HCI-NS-VSD4221DR | VANITY SINK BASE DRAWER TO THE RIGHT 42"W 34.5"H 21"D | Original price was: $1,374.75.$785.26Current price is: $785.26. |
DOUBLE SINK VANITY
| Image | Alt Image | SKU | Description | Qty | Price | |
|---|---|---|---|---|---|---|
| | HCI-NS-VSD6021DD | DOUBLE SINK VANITY 60"W 34.5"H 21"D | Original price was: $1,877.39.$1,072.36Current price is: $1,072.36. |
COUNTER LINEN
| Image | Alt Image | SKU | Description | Qty | Price | |
|---|---|---|---|---|---|---|
| | HCI-NS-CL156012 | Counter Linen WALL CABINET WITH DRAWERS ON BOTTOM | Original price was: $1,311.60.$749.19Current price is: $749.19. |
KNEE DRAWER
| Image | Alt Image | SKU | Description | Qty | Price | |
|---|---|---|---|---|---|---|
| — | HCI-NS-KD2421 | Vanity Knee Drawer, W 24", D 21", H 7" | Original price was: $301.67.$172.32Current price is: $172.32. | ||
| — | HCI-NS-KD3021 | Vanity Knee Drawer, W 30", D 21", H 7" | Original price was: $373.16.$213.15Current price is: $213.15. |
OVEN PANTRY
| Image | Alt Image | SKU | Description | Qty | Price | |
|---|---|---|---|---|---|---|
| | HCI-NS-OC338424 | OVEN PANTRY 33"W 84"H 24"D | Original price was: $2,469.47.$1,410.55Current price is: $1,410.55. | ||
| | HCI-NS-OC339024 | OVEN PANTRY 33"W 90"H 24"D | Original price was: $2,580.42.$1,473.94Current price is: $1,473.94. | ||
| | HCI-NS-OC339624 | OVEN PANTRY 33"W 96"H 24"D | Original price was: $2,692.91.$1,538.19Current price is: $1,538.19. |
BASE MOULDING
| Image | Alt Image | SKU | Description | Qty | Price | |
|---|---|---|---|---|---|---|
| — | HCI-NS-BM8 | Base Molding, W 0.25", H 4.5", D 96" | Original price was: $219.31.$125.27Current price is: $125.27. |
CORBELS
| Image | Alt Image | SKU | Description | Qty | Price | |
|---|---|---|---|---|---|---|
| — | HCI-NS-CORBEL8"X12" | Corbel, W 3", H 12", D 8" | Original price was: $175.93.$95.70Current price is: $95.70. |
CROWN MOULDING
| Image | Alt Image | SKU | Description | Qty | Price | |
|---|---|---|---|---|---|---|
| — | HCI-NS-CR8 | Chair Rail Molding, W 0.25", H 4.5", D 96" | Original price was: $110.93.$63.37Current price is: $63.37. |
LEGS
| Image | Alt Image | SKU | Description | Qty | Price | |
|---|---|---|---|---|---|---|
| — | HCI-NS-DLS4*4*34 1/2 | Leg Post, W 4", H 34.5", D 4" | Original price was: $297.58.$169.97Current price is: $169.97. |
DISHWASHER PANEL
| Image | Alt Image | SKU | Description | Qty | Price | |
|---|---|---|---|---|---|---|
| — | HCI-NS-DWR3 | Dishwasher Panel, W 3", H 34.5", D 24" | Original price was: $155.34.$88.73Current price is: $88.73. |
FLOATING SHELFS
| Image | Alt Image | SKU | Description | Qty | Price | |
|---|---|---|---|---|---|---|
| — | HCI-NS-FS30 | Floating Shelves, W 30", H 2.5", D 12" | Original price was: $543.75.$310.59Current price is: $310.59. | ||
| — | HCI-NS-FS36 | Floating Shelves, W 36", H 2.5", D 12" | Original price was: $598.13.$341.65Current price is: $341.65. | ||
| — | HCI-NS-FS42 | Floating Shelves, W 42", H 2.5", D 12" | Original price was: $659.75.$376.86Current price is: $376.86. |
OUTSIDE CORNER MOULDING
| Image | Alt Image | SKU | Description | Qty | Price | |
|---|---|---|---|---|---|---|
| — | HCI-NS-OCM8 | Outside Corner Molding, W 0.75", H 0.75", L 96" | Original price was: $59.45.$33.96Current price is: $33.96. |
DRAWERS
| Image | Alt Image | SKU | Description | Qty | Price | |
|---|---|---|---|---|---|---|
| — | HCI-NS-ODB7" | 33"Oven/Microwave Cabinet drawers | Original price was: $235.99.$128.38Current price is: $128.38. | ||
| — | HCI-NS-ODB11" | 33"Oven/Microwave Cabinet drawers | Original price was: $272.24.$148.10Current price is: $148.10. |
PLYWOOD PANEL
| Image | Alt Image | SKU | Description | Qty | Price | |
|---|---|---|---|---|---|---|
| — | HCI-NS-PNL34.5*96*1/2 | Panel, W 34.5", H 96", D 5" | Original price was: $453.68.$259.13Current price is: $259.13. | ||
| — | HCI-NS-PNL34.5*96*1/4 | Panel, W 34.5", H 96", D 0.25" | Original price was: $326.61.$186.57Current price is: $186.57. | ||
| — | HCI-NS-PNL34.5*96*3/4 | Panel, W 34.5", H 96", D 75" | Original price was: $562.60.$321.35Current price is: $321.35. |
REFRIGERATOR PANEL
| Image | Alt Image | SKU | Description | Qty | Price | |
|---|---|---|---|---|---|---|
| — | HCI-NS-REP1.5*96*24 | Refrigerator Panel, W 1.5", H 96", D 24" | Original price was: $353.00.$201.64Current price is: $201.64. |
SCRIBE MOULDING
| Image | Alt Image | SKU | Description | Qty | Price | |
|---|---|---|---|---|---|---|
| — | HCI-NS-SM8 | Scribe Molding, W 0.25", H 0.75", L 96" | Original price was: $32.63.$18.63Current price is: $18.63. |
6" FILLER
| Image | Alt Image | SKU | Description | Qty | Price | |
|---|---|---|---|---|---|---|
| — | HCI-NS-TF6*96 | Tall Fillers, W 6", H 96", D 0.75" | Original price was: $333.25.$190.34Current price is: $190.34. | ||
| — | HCI-NS-WF342 | Fillers, W 3", H 42", D 0.75" | Original price was: $51.19.$29.23Current price is: $29.23. | ||
| — | HCI-NS-WF630 | Fillers, W 6", H 30", D 0.75" | Original price was: $79.90.$45.63Current price is: $45.63. | ||
| — | HCI-NS-WF642 | Fillers, W 6", H 42", D 0.75" | Original price was: $125.50.$71.67Current price is: $71.67. |
TOE KICK
| Image | Alt Image | SKU | Description | Qty | Price | |
|---|---|---|---|---|---|---|
| — | HCI-NS-TK8 | 8 Toe Kick | Original price was: $61.05.$34.87Current price is: $34.87. |
WINE RACK
| Image | Alt Image | SKU | Description | Qty | Price | |
|---|---|---|---|---|---|---|
| — | HCI-NS-WRC3015 | WALL WINE RACK CABINET 30"W 15"H 12"D | Original price was: $729.47.$416.66Current price is: $416.66. |
TOUCH UP KIT
| Image | Alt Image | SKU | Description | Qty | Price | |
|---|---|---|---|---|---|---|
| — | HCI-NS-TUK | TOUCH UP KIT | Original price was: $50.75.$38.00Current price is: $38.00. |
STEM GLASS HOLDER
| Image | Alt Image | SKU | Description | Qty | Price | |
|---|---|---|---|---|---|---|
| — | HCI-NS-30GR | Glass Holder W30" H1.5" D12" | Original price was: $258.00.$147.36Current price is: $147.36. |
ROLL OUT TRAYS
| Image | Alt Image | SKU | Description | Qty | Price | |
|---|---|---|---|---|---|---|
| — | HCI-NS-ROT18 | Roll Out Trays, W 14", H 3.75", D 21" | Original price was: $123.61.$70.62Current price is: $70.62. | ||
| — | HCI-NS-ROT24 | Roll Out Trays, W 20", H 3.75", D 21" | Original price was: $135.00.$77.11Current price is: $77.11. | ||
| — | HCI-NS-ROT30 | Roll Out Trays, W 26", H 3.75", D 21" | Original price was: $147.36.$84.16Current price is: $84.16. | ||
| — | HCI-NS-ROT36 | Roll Out Trays, W 32", H 3.75", D 21" | Original price was: $164.29.$93.84Current price is: $93.84. |



&url=https://cabinetrystock.com/product/shaker-arctic-sa/&media=https://cabinetrystock.com/wp-content/uploads/2026/03/AV-SA-KITCHEN.webp)


%20–%20Un-Assembled%20Cabinets&url=https://cabinetrystock.com/product/vidar-oak-vo/&media=https://cabinetrystock.com/wp-content/uploads/2026/03/VIDAR-OAK-VO-700x1050-1.webp)